I used to dread that 3 PM slump. You know the one? Where your brain turns to mush and you’d kill for a candy bar. Then I found these No-Bake Peanut Butter Protein Energy Balls! Honestly, they changed the game. “Let food be thy medicine,” Hippocrates said, but nobody mentioned medicine could taste like a cheat day dessert! I’m obsessed. We’re talking 10 minutes, zero oven time, and pure deliciousness. Let’s dive in!

Gathering Your Ingredients for High-Protein Success
I remember the first time I decided to make these. I stood in the middle of the grocery aisle for what felt like twenty minutes, just staring at the wall of peanut butters. I thought, “It’s just peanut butter, grab one!” But oh, I was so wrong.
I grabbed a fancy, super-natural jar where the oil sat on top like a swimming pool. I didn’t stir it enough. The result? My No-Bake Peanut Butter Protein Energy Balls were a greasy, sliding mess that wouldn’t hold a shape to save their life. It was a disaster.
So, let’s skip the frustration I went through. I want to walk you through exactly what you need so you don’t end up with a bowl of protein soup.
Picking the Right Nut Butter
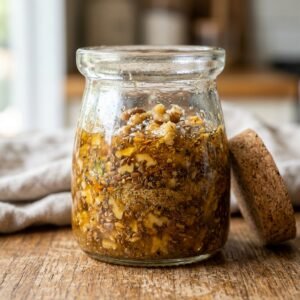
This is the most critical part of the recipe. You need a nut butter that is creamy but thick. If you use the natural kind that separates, you have to stir it until your arm hurts. Seriously, mix it until it is completely uniform.
If the peanut butter is too runny, the balls won’t set. If it’s the cheap stuff with tons of added oil, it might be too slick. I usually stick to a standard creamy peanut butter or a well-mixed almond butter. It acts as the glue. Without good glue, your project falls apart.
The Protein Powder Predicament
Not all powders are created equal. I used a vanilla whey isolate once, and it made the dough incredibly sticky. It was like trying to roll glue.
If you use a plant-based protein powder, keep in mind that they are thirsty. They absorb a lot of moisture. You might need to add a splash of water or milk if the dough feels too crumbly.
- Whey: sticky, smooth texture.
- Plant-based (Pea/Rice): dry, chalky, absorbs liquid fast.
Pick a flavor you actually like drinking. If you hate the taste in a shake, you will hate it in these energy bites. Chocolate or vanilla usually works best.
Oats and Sweeteners
Do not buy instant oats. Just don’t do it. Instant oats turn into mush the second they touch moisture. You want Old-Fashioned Rolled Oats. They give the ball structure and that nice chewiness we are looking for.
For the sweetener, you need something sticky. Honey is my go-to because it bonds everything together perfectly. Pure maple syrup works too, but it is a little thinner, so be careful.
Using granular sugar won’t work here because it doesn’t help bind the ingredients. Stick to the liquid stuff.
Healthy Fats and Add-Ins
This is where you can have some fun. I always toss in chia seeds or flaxseed meal. You can’t really taste them, but they add a nice crunch and good fiber.
If you are adding chocolate chips (which you totally should), use mini chips. Regular-sized chips are too big and make the balls hard to roll. I learned that the hard way when my giant chocolate chunks kept falling out of the dough. It was annoying.
Getting your ingredients right is half the battle. Once you have the right stuff on the counter, the actual making part is a breeze.

Mixing the Perfect Dough Texture Without Baking
I have to be honest with you; I once snapped a wooden spoon right in half trying to mix a batch of these. It was a dense, sticky disaster. I stood there holding the handle, staring at the spoon head stuck in a glob of peanut butter and oats, and I just wanted to scream. It was frustrating! But that’s how I learned that mixing No-Bake Peanut Butter Protein Energy Balls requires a bit of finesse and the right technique.
You don’t want to muscle through it blindly. You want a dough that holds together but isn’t a brick.
The Great Debate: Food Processor vs. By Hand
There are two ways to do this, and I have strong feelings about both. If you use a food processor, your energy bites will have a cookie dough texture. It chops the oats up fine, blending them completely with the protein powder and sticky sweeteners. It’s smooth and easy to roll.
However, I hate washing the food processor. It’s a pain.
So, I usually mix by hand. This leaves the old-fashioned rolled oats whole, giving you a chewier, heartier snack. Just be warned: it requires some elbow grease. If you are mixing by hand, warm up your nut butter slightly in the microwave for 10-15 seconds. It makes it way easier to stir without breaking your favorite spoon.
Troubleshooting the “Sand vs. Slime” Problem
The biggest issue people run into is the moisture balance. Sometimes you follow the recipe exactly, and it looks like a bowl of dry sand. Other times, it’s a sticky slime that coats your hands.
This happens because ingredients vary. Your protein powder might be super absorbent, or your oats might be drier than mine.
- If it’s too crumbly: Add water or almond milk, one teaspoon at a time. Don’t go crazy! A little liquid goes a long way.
- If it’s too sticky: Add more oats or a sprinkle of coconut flour. You want it to be tacky, not wet.
I usually let the mixture sit for about five minutes after mixing. The oats need time to soak up the moisture from the maple syrup and peanut butter. If you try to roll it immediately, it might fall apart, but give it five minutes, and it magically sticks together.
When to Add the Good Stuff
Here is a mistake I made often: dumping the chocolate chips in with the warm peanut butter. Don’t do that. You will end up with a brown, smeared mess because the chips will melt instantly.
Mix your base dough first—oats, protein, binder, and fats. Once that is fully combined and cooled slightly, then fold in your mini chocolate chips or dried fruit. This ensures they stay intact and you get a nice bite of chocolate in every ball, rather than just chocolate-flavored dough.
Getting the texture right feels like a science experiment sometimes. But once you feel that perfect “play-dough” consistency, you know you’re golden.

Rolling and Storing Your Energy Bites for Meal Prep
Rolling these things used to drive me crazy. I would end up with peanut butter under my fingernails for days. It was gross. And my “balls” looked more like sad lumps of coal than the pretty pictures on Pinterest. I realized I needed a system or I was going to quit making them.
First off, put that bowl in the fridge. Do not try to roll warm dough. It is a sticky nightmare. I leave mine in there for about 20 or 30 minutes. It firms up the peanut butter and makes the mixture way easier to handle. If you skip this step, don’t say I didn’t warn you when your hands are covered in goo.
getting the size right
For sizing, I stopped guessing. I used to just grab chunks with my hand, but then some were huge and some were tiny. Now, I use a small cookie scoop. It makes every bite the exact same size. This is great if you count calories or macros because you know exactly what you are getting. Plus, they look way better sitting in the container.
Keeping Them Fresh
Speaking of containers, you need a good one. An airtight container is a must. If air gets in, they dry out and get hard as rocks. nobody wants to break a tooth on a snack. I keep mine in the fridge, and they stay fresh for about two weeks. Though honestly, my family usually eats them all way before then.
Freezing for Later
If you want to be a meal prep pro, throw them in the freezer. I put them on a baking sheet first so they freeze individually. After an hour, I dump them into a big freezer bag. They stay good for months!
When I’m running out the door in the morning, I just grab two frozen ones. By the time I get to work, they are thawed and perfect. It’s the best hack for busy mornings when you don’t have time to think about food.

Customizing Flavor Variations You Will Love
I get bored easily. If I eat the exact same snack every single day for a week, by Friday, I never want to see it again. It’s a problem. That is why I started playing around with this recipe. The base is simple, which means you can throw in almost anything to change it up.
You don’t have to stick to just plain peanut butter and chocolate chips. I like to get creative depending on what I have sitting in my pantry.
The Chocolate Lover’s Dream
Sometimes, a few mini chips aren’t enough. I have those days where I need serious chocolate therapy. When that happens, I add a tablespoon of unsweetened cocoa powder right into the dry oats before mixing.
It turns the whole ball into a brownie bite. If I’m feeling really fancy (or just had a rough week), I melt a little dark chocolate and drizzle it over the top. It hardens in the fridge and gives it a nice snap when you bite into it. It feels like eating a truffle, but it’s actually fueling your body.
Nut-Free for School Safety
Being a teacher, I know all about the “nut-free zone.” You can’t bring peanut butter into most schools anymore. But that doesn’t mean you can’t pack these for lunch.
I swap the peanut butter for sunflower seed butter. It works exactly the same way. Just a heads up—sometimes sunflower butter reacts with the baking soda or powder in other recipes and turns green. Since we aren’t baking these, it usually stays brown, but if you see a green tint, don’t freak out. It’s just a chemical reaction, it is safe to eat!
A Tropical Twist
In the middle of winter, I like to pretend I am somewhere warm. I swap the chocolate chips for dried pineapple pieces and add shredded coconut.
Make sure you get the unsweetened coconut flakes, though. The sweetened stuff makes it way too sugary, and it hurts my teeth. This combo tastes a bit like a piña colada. It’s refreshing and breaks up the monotony of the usual nutty flavors.
Spice It Up
Don’t underestimate your spice cabinet. A dash of cinnamon goes a long way. I think it makes them taste like an oatmeal raisin cookie. Or try a splash of vanilla extract. It brings out the sweetness of the honey without adding any sugar.
I’ve even tried pumpkin pie spice in October. It was surprisingly good! The point is, don’t be afraid to experiment. The worst that happens is you have a batch you don’t love, but even the “failures” usually taste pretty good.

Well, that is pretty much it. I really hope you give these a shot. They honestly saved me from buying junk food at the vending machine during my prep period more times than I can count. It feels good to eat something that tastes like a dessert but actually gives you energy instead of a sugar crash.
If you decide to make them, let me know how they turned out! Did you stick to the recipe, or did you go rogue with the spices? I would love to hear about it.
And hey, if you found this recipe helpful, please share it on Pinterest! It helps me out a ton and makes it easier for other people to find healthy snacks too. Plus, you can save it to your own board so you don’t have to go digging for the recipe next time you are hungry. Thanks for hanging out with me!