Did you know that the average person spends over $3,000 a year on takeout lunches? That is a lot of money! I used to be one of them, staring at a sad, wilting salad in a plastic container that I brought from home, only to toss it and buy a sandwich. I couldn’t stand the sogginess. But then, I discovered the vertical advantage.
A Tuna Salad Mason Jar with Chickpeas isn’t just a trend; it is a total lifesaver for busy weeks. By stacking your ingredients smartly, you keep the wet stuff away from the dry stuff until you are ready to shake and eat. It’s fresh, it’s crunchy, and honestly, it looks beautiful sitting in the fridge! I’m going to show you exactly how to layer this protein-packed power lunch so you actually look forward to your midday break. Let’s dive in!
 1")
Why You Need This Tuna Chickpea Salad in Your Rotation
I have to be honest with you—I used to be terrible at lunch. For the longest time, I was that teacher running to the cafeteria vending machine or spending way too much cash on takeout salads that weren’t even that good. My wallet was hurting, and my energy levels were crashing by 2 PM. I tried bringing leftovers, but they were usually unappealing by Wednesday. Then I stumbled onto the Tuna Salad Mason Jar with Chickpeas. It honestly changed my whole week.
The Protein Punch That Gets You Through Grading Papers
We all know that feeling of hitting a wall in the afternoon. I learned the hard way that a bagel just doesn’t cut it. You need staying power. This Tuna Salad Mason Jar with Chickpeas is packed with protein. Between the canned tuna and the chickpeas, you are looking at a serious amount of fuel.
I remember reading somewhere that chickpeas are a “superfood,” and while I’m no nutritionist, I know they keep me full until dinner. Plus, they hold up really well in the fridge. Unlike lettuce which can get weirdly slimy, chickpeas stay firm. It’s a high protein lunch that actually tastes fresh three days later.
Stop Throwing Money Away
Let’s talk about the cost for a second. I sat down and did the math last month because I’m a nerd like that. Buying a salad near my school costs about $14. Making four of these jars on a Sunday costs me maybe $12 total. That is a huge difference!
Canned tuna is cheap. Dried or canned chickpeas are cheap. Carrots and celery? Super cheap. You are basically saving money to eat better food. I used to buy those fancy pre-made salads at the grocery store, but half the time the greens were already wilting before I opened the package. Total waste of money. With this meal prep method, you control the quality and the price tag.
The “No Soggy Salad” Promise
This was my biggest struggle. I hate soggy food. Texture is a big deal for me. If my croutons are soft or my lettuce is wet, I can’t eat it. The magic of the Tuna Salad Mason Jar with Chickpeas is the stacking.
By putting the wet ingredients (like the dressing and the tuna mixture) at the bottom and the leafy greens at the very top, nothing touches until you dump it out. I messed this up the first time, though. I put the spinach right on top of the tuna. Big mistake. By Tuesday, the spinach was a gross green mush. Now, I use a “shield” layer of veggies like celery or peppers in between. It keeps everything crisp.
Automatic Portion Control
Another thing I love is that the jar does the measuring for me. I use the wide-mouth quart jars. They hold exactly enough food to fill me up without leaving me stuffed. When I use Tupperware, I tend to overpack or underpack.
The jar forces you to layer things logically. It’s kind of satisfying to see them all lined up in the fridge, looking colorful and organized. It makes me feel like I actually have my life together, even if my desk is a mess of papers! So, if you are looking for a healthy lunch idea that saves you cash and doesn’t turn into a science experiment in the fridge, this is it.
 2")
Essential Ingredients for a Flavorful Salad Jar
To make a Tuna Salad Mason Jar with Chickpeas that actually tastes good, you can’t just throw whatever you have in the fridge into a jar. I learned that the hard way. I once tried using leftover iceberg lettuce and it was a watery mess by lunchtime. You need ingredients that are tough enough to sit in the fridge for a few days without going bad. Here is what I buy during my Sunday grocery run.
The Protein Base
First off, let’s talk about the tuna. I am picky about this. I always grab the solid white albacore tuna packed in water. I stay away from the oil-packed stuff because I like to add my own healthy fats later, and the oil can get kind of heavy. The solid white holds its shape better than “chunk light,” which kind of looks like cat food to me sometimes.
Then there are the chickpeas (or garbanzo beans, whatever you call them). These are the real MVP of the jar. I usually just buy the store-brand cans to save a few cents. The trick here is to rinse them really, really well. That foamy liquid in the can needs to go. I dump them in a colander and rinse until the water runs clear, then I let them dry on a paper towel for a minute. If they are too wet, they water down your dressing.
The Crunch Factor
Since I prep these on Sunday night for the whole week, I need veggies that stay crisp. Soft veggies are the enemy here.
- Celery: This is my go-to. It gives a great crunch and doesn’t get soggy easily.
- Red Onion: I chop this pretty fine. It gives it a nice kick, but you don’t want huge chunks or your breath will be terrible for afternoon classes.
- Bell Peppers: I like the red or orange ones because they are sweeter. Green ones can be a bit bitter after a day or two.
- Cucumbers: These are tricky. If you use them, scoop out the seeds first with a spoon. The seeds are full of water and will mess up your salad.
The Dressing
Please don’t use the bottled ranch for this. It just doesn’t sit right at the bottom of the jar. I make a simple vinaigrette. It takes like two minutes. I use olive oil, fresh lemon juice, salt, and pepper. Sometimes I add a little Dijon mustard if I’m feeling fancy.
The acid in the lemon juice actually helps keep the other ingredients tasting fresh. Plus, it cuts through the fishiness of the tuna. If you want something creamy, you can use Greek yogurt mixed with lemon, but honestly, the oil and vinegar holds up better for a 5-day work week.
Fresh Herbs
This is the step most people skip, but don’t do it! Fresh herbs make the difference between a “sad desk lunch” and a meal you actually want to eat. I use flat-leaf parsley. It is super cheap—usually like a dollar a bunch. I chop up a whole bunch of it.
You could use dill if you like that pickle taste, or cilantro if you are into that. But dried herbs from the shaker just don’t have the same punch. The fresh green stuff adds flavor and makes the jar look pretty, which helps when you are staring at it in the breakroom fridge.
 3")
The Art of Layering: How to Stack for Freshness
The order you put things in the jar is the most important part. Seriously. If you just throw it all in, you get mush. I call it the “Vertical Advantage” to my students when I’m trying to sound cool (they don’t think I’m cool). Here is the exact order I use to keep my Tuna Salad Mason Jar with Chickpeas crisp for five days.
Layer 1: The Dressing (The Foundation)
Always, always start with the dressing. Pour your lemon vinaigrette or whatever sauce you are using right into the empty jar. It sits at the very bottom. This keeps it away from the delicate stuff until you are ready to eat. I usually do about two tablespoons per jar. If you put the dressing on top, gravity pulls it down and makes everything soggy by Monday morning.
Layer 2: The Shield (Hard Veggies)
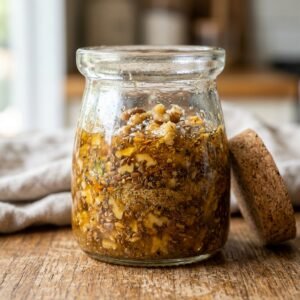
This is where the magic happens. You need a barrier between the dressing and the tuna. I put my chickpeas and the hard vegetables here—like the carrots, celery, and peppers. They are tough enough to “marinate” in the dressing without getting gross. Actually, the chickpeas taste better after sitting in the lemon juice for a few days. They soak up the flavor and act like a shield for the rest of the ingredients.
Layer 3: The Protein (The Tuna)
Next, I scoop in the tuna salad mixture. Since the tuna is moist (even after draining), you don’t want it touching the lettuce directly either. By sitting on top of the hard veggies, it stays separate from the dressing pool at the bottom. I usually mix my tuna with just a tiny bit of mayo or yogurt before putting it in, so this layer is heavy enough to press down the veggies but light enough not to crush them.
Layer 4: The Top (The Greens)
The very last thing you put in is your leafy greens. Whether it’s spinach, arugula, or romaine, pack it in at the very top. Because it is far away from the dressing and the wet tuna, it stays dry. I stuff as much spinach as I can fit in there. You need a lot of greens to make it a full meal. Then, screw the lid on tight. When you open it four days later, that lettuce will be just as crisp as when you bought it.
 4")
Storage Tips and Serving Suggestions
So you prepped your jars on Sunday. Now what? I usually line mine up on the middle shelf of the fridge. I try to keep them in the back where it stays colder. You don’t want them in the door; the temperature changes too much there every time someone opens it to grab a juice box or milk.
How Long Do They Last?
In my experience, these are good for about four days. By Friday, the lettuce might be a little less crisp, but it’s still way better than a soggy sandwich. Because it is fish, I am a little extra careful. I usually plan to eat the tuna jars Monday through Wednesday or Thursday.
If you are prepping for Friday, maybe make that a chickpea-only jar without the tuna, just to be safe. Always use your nose before you eat. If it smells funny, toss it. It is not worth getting a stomach ache during 4th period.
The “Shake and Dump”
This is the fun part. When I sit down in the staff room, I take the lid off and pour the whole thing into a bowl. Because the dressing was at the bottom, when you flip the jar over, it pours out over the top of the lettuce. It coats everything perfectly without you having to stir it much.
If you forget a bowl (I have done this a million times), you can just shake the jar really hard with the lid on. Then you can eat it straight from the jar. It is a little harder to get to the bottom, but it works in a pinch.
Why Jar Size Matters
When I started, I used regular spaghetti sauce jars. That was a mistake. It was so hard to get the fork in there. Do yourself a favor and buy the wide-mouth quart jars. They are way easier to fill up without making a mess on the counter, and they are much easier to eat out of. They hold a full meal-sized salad so you aren’t hungry an hour later.
 5")
Seriously, once you get the hang of this Tuna Salad Mason Jar with Chickpeas, you aren’t going to want to go back to soggy sandwiches. It just makes the work week so much smoother. I love opening the fridge on a Tuesday morning and seeing my lunch already made. It takes one thing off my plate when I’m rushing out the door.
No more sad, wilted lettuce or spending fifteen bucks on a bowl of greens that leaves you hungry an hour later. Give this a shot this Sunday. Turn on some music, chop some veggies, and get your week sorted. Your future self will be really happy you did.
Don’t forget to save this pin to your “Healthy Lunch Ideas” board on Pinterest so you never lose this recipe!