I have to confess something: I used to think kale was just a garnish. Just decoration for the real food! But then, I threw some in the oven with a little “magic dust” (hello, nutritional yeast), and everything changed. Seriously, my life changed! This isn’t just a salad substitute; it is a savory, umami-packed explosion that rivals any bag of potato chips. Did you know that kale is one of the most nutrient-dense foods on the planet? Yet, getting that perfect crunch without burning it can be tricky. Don’t worry, though. I’ve made all the mistakes so you don’t have to. We are going to turn those leafy greens into Crispy Kale Chips with Nutritional Yeast that will have your family begging for seconds. Let’s get baking!
 1")
Why Nutritional Yeast is the Secret Ingredient
I still remember the first time my friend Sarah handed me a jar of this yellow, flaky powder. She called it “nooch,” and honestly, I thought she was pulling my leg. It looked like fish food! But she promised me it was the game-changer for making Crispy Kale Chips with Nutritional Yeast, so I gave it a shot.
I sprinkled it tentatively over my baking sheet. The smell was… interesting. Kind of funky, but in a good way.
Fast forward twenty minutes, and I was eating those chips straight off the hot pan, burning my fingers because I couldn’t wait. That day, I learned that you shouldn’t judge a seasoning by its look.
What in the World is “Nooch”?
If you are scratching your head, don’t worry, I was there too. Nutritional yeast is actually a deactivated yeast, specifically a strain called Saccharomyces cerevisiae. It’s grown on molasses and then harvested, washed, and dried with heat to stop it from growing.
Because it’s deactivated, it won’t make your bread rise or froth up like active yeast does. It just sits there, looking golden and waiting to bring the flavor.
I used to think yeast was just for baking loaves of bread or brewing beer. Boy, was I wrong. This stuff is a powerhouse all on its own.
The Cheesy Flavor Hack
Here is the thing that blows my mind every single time. It tastes exactly like cheddar cheese. I’m not kidding!
If you are trying to cut back on dairy or you are fully vegan, this is your new best friend. It has this nutty, savory, cheesy profile that hits the spot when you are craving junk food.
I actually made a batch of these kale chips for my nephew’s movie night once. He is a die-hard cheese lover and usually refuses to eat anything green. I didn’t tell him they were dairy-free.
He polished off the whole bowl. When I told him it was just yeast and veggies, he looked at me like I was a wizard. That was a total “cool aunt” victory for me.
A Vitamin B Bomb
But we aren’t just eating it because it tastes good, right? We want that nutrition. Nutritional yeast is famous for being packed with B-vitamins.
Specifically, it is often fortified with B12, which is super hard to get on a plant-based diet. It’s also got a surprising amount of protein for a powder.
So when you are munching on Crispy Kale Chips with Nutritional Yeast, you aren’t just snacking. You are practically taking a vitamin supplement that tastes like Cheetos.
Why Salt Isn’t Enough
You might be thinking, “Can’t I just use sea salt?” You can, but you will be missing out on the “umami.”
Umami is that deep, savory flavor that makes you want to keep eating. Salt makes things salty, but nutritional yeast adds depth.
I made the mistake of running out of nooch once and just used salt and garlic powder. It was sad. It was flat.
The chips were crunchy, sure, but they lacked that addictive quality. I learned my lesson: never run out of the yellow dust.
It helps the oil stick to the leaves, too, creating a better crust. It’s practically magic.
 2")
Selecting and Prepping Your Kale for Maximum Crunch
I used to think kale was just kale. Green, leafy, healthy. So I grabbed the first bunch I saw, chopped it up, and threw it in the oven.
Big mistake.
I ended up with these flat, chewy things that tasted like burnt paper. It turns out, the type of kale you buy actually matters a lot for Crispy Kale Chips with Nutritional Yeast.
Curly vs. Lacinato (Dino)
There are usually two main types at the store: the curly kind that looks like a ruffle, and the flat kind that looks like reptile skin (that’s the Lacinato or Dino kale).
For chips, you want the curly one. Trust me on this.
The curly leaves have all these little folds and pockets. That is where the oil and the nutritional yeast hide. It holds onto the flavor way better.
The flat kale just lets the seasoning slide right off. Plus, the curly kind crisps up lighter and airier.
Get Rid of Those Stems
Okay, this is the part my kids actually like to help with. You have to remove the stems.
The center rib of the kale leaf is tough. It’s woody. If you leave it in, you will be chewing on it long after the chip is gone. It is not pleasant.
You don’t need a knife for this. Just grab the thick stem with one hand and strip the leaves off with the other. It’s kinda satisfying.
Discard the stems or save them for a smoothie if you are feeling super healthy (I usually just compost them).
The Water Problem
If you take one thing away from this, let it be this: Water is the enemy of crunch.
I washed my kale once and didn’t dry it enough. I was in a rush. I put it in the oven, and instead of frying, it steamed.
I opened the oven door and got hit with a face full of wet vegetable smell. The chips were soggy and sad.
You need to wash the dirt off, absolutely. But then you have to get it bone dry.
I use a salad spinner. If you don’t have one, lay the leaves out on a clean kitchen towel and pat them down. Then pat them again.
If they are wet, they won’t crisp. It’s that simple.
Size Matters
When you are tearing the leaves, try to make them the same size.
If you have huge pieces and tiny pieces on the same tray, the tiny ones will burn to a crisp before the big ones are even done.
I aim for pieces about the size of a potato chip. They shrink a lot in the oven, so don’t go too small.
It takes a few extra minutes to prep it right, but it saves you from eating burnt crumbs later.
 3")
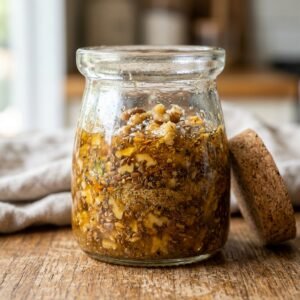
The Essential Ingredients Checklist
One of the best things about this recipe is that you probably have most of the stuff in your pantry right now. You don’t need to go to a specialty store, well, except maybe for the nutritional yeast if you haven’t bought it yet.
But even that is in most regular grocery stores now. I usually find it in the baking aisle or the “health food” section.
Here is exactly what you need to make Crispy Kale Chips with Nutritional Yeast that actually taste good.
The Oil Situation
I tried making these with melted butter once because, well, I love butter. It was a disaster. The butter burned way too fast in the oven, and the chips tasted bitter.
You need an oil that can handle the heat.
I always grab avocado oil or a light olive oil. They have a higher smoke point, which means they won’t burn up at 300 degrees.
If you only have extra virgin olive oil, that works too, but it has a stronger flavor. Just make sure you don’t drown the kale. You aren’t frying it in a deep fryer; you are just coating it.
A tablespoon or two is usually plenty for a big bunch. If you use too much, they get soggy. If you use too little, the seasoning falls off. It’s a balance.
Getting the Ratio Right
Here is where I see people mess up. They are scared of the yeast. They sprinkle a tiny teaspoon on top like it’s fairy dust.
Don’t be shy!
For one big bunch of kale, I use at least 1/4 cup of nutritional yeast. It seems like a huge amount, I know. But remember, kale has a lot of surface area. Plus, some of it always falls off onto the baking sheet (which is the best part to eat later, by the way).
Then I mix in about half a teaspoon of fine sea salt. I like fine salt better than the coarse stuff here because it sticks better.
Spice It Up (Optional)
Basic is good, but sometimes I like to get fancy.
Garlic powder is pretty much non-negotiable in my house. I add about a teaspoon to the yeast mix. It gives it that savory punch.
If I’m feeling like I want something smoky, I throw in a pinch of smoked paprika. It gives the chips a “bacon-y” vibe that is super delicious.
And if you like heat? A dash of cayenne pepper or chili powder will wake you up. Just be careful, because the heat intensifies in the oven.
The Secret Acid Kick
This is a trick a friend told me a few years ago. I didn’t believe her, but now I do it every time.
Add a splash of acid.
I mix about a teaspoon of lemon juice or apple cider vinegar into the oil before I massage it onto the leaves.
You won’t really taste “lemon” in the final chip. But it brightens up the flavor and cuts through the richness of the oil and the yeast. It makes the whole thing pop.
So, gather your lineup: Kale, Oil, Nooch, Salt, Garlic, and a squeeze of Lemon. That is it. Simple.
 4")
Step-by-Step Baking Instructions (Low and Slow)
Okay, this is where the rubber meets the road. Or I guess, where the kale meets the heat. You have your bowl of prepped leaves, your oil, and your seasoning. Now what?
Get Your Hands Dirty (Literally)
First, pour your oil and that lemon juice over the dry leaves. Now, don’t just stir it with a spoon. A spoon won’t cut it. You have to use your hands.
I call it “massaging” the kale, which sounds kind of fancy, but it really just means squishing it around. You need to rub the oil into every little curl and fold of the leaf. If a piece of kale is dry, it will burn. If it has oil, it will crisp.
After they are all shiny and coated, dump in your nutritional yeast, salt, and garlic powder mix. Toss it again with your hands until every leaf looks like it’s covered in yellow dust. It’s gonna get under your fingernails. Just accept it.
The Single Layer Rule
This is the hill I will die on. You cannot—I repeat, cannot—pile the kale up on the baking sheet.
I tried to be lazy once. I had too much kale for one tray, so I just heaped it all on there. I thought, “It’ll shrink, it’s fine.”
It wasn’t fine. The bottom layer just steamed in its own juices. It was gross.
Spread them out in a single layer. They shouldn’t be touching each other too much. If you need two trays, use two trays. It makes a huge difference.
The Temperature Sweet Spot
Crank your oven to… wait for it… 300°F (150°C).
I know, most roasting happens at 400°F. But kale is delicate. And nutritional yeast? It burns fast. If you put it in a hot oven, you’ll smell burning cheese within five minutes, and your smoke alarm will start screaming at you. Ask me how I know.
Low heat dries the leaves out slowly so they get crunchy all the way through without turning into charcoal.
The Rotation Method
Pop your trays in the oven. Set a timer for 10 minutes.
When the timer goes off, don’t just sit there. Open the oven and rotate the pan. Turn it around 180 degrees.
My oven has a hot spot in the back left corner. If I don’t turn the tray, the chips in that corner get blackened while the front ones are still limp.
While you are at it, give the chips a little shake or flip them over if you have the patience. I usually just shake the pan.
Bake them for another 10 to 15 minutes. Watch them like a hawk near the end. They go from “perfect” to “burnt” in about 30 seconds.
You want them stiff and crispy to the touch, but still green. If they turn brown, you went too far.
Pull them out and let them sit on the pan for a few minutes. They actually get crispier as they cool down. Then, try not to eat the whole tray before dinner. Good luck with that.
 5")
Troubleshooting: Why Are My Kale Chips Soggy or Bitter?
I’ve had my fair share of baking fails. I’ve pulled trays out of the oven that looked perfect, only to take a bite and realize they were soft and chewy. Or worse, I’ve made a batch that tasted like pure charcoal.
It happens to the best of us. If your chips didn’t turn out quite right, don’t throw them away just yet (unless they are burnt to a crisp). Here is usually what went wrong.
The Soggy Culprit
If your chips are limp, it’s almost always moisture.
Remember when I said to dry the kale? I really meant it. If there was still water on the leaves when you added the oil, the oil couldn’t stick to the leaf. So the water steamed the kale instead of roasting it.
Another reason is using too much oil. You don’t want the leaves swimming in it. They should just be lightly coated. If they are dripping, they will never get crisp.
Fix it: If they are just a little soft, you can usually put them back in the oven for another 5 minutes. Just watch them closely!
The Burnt Taste
Kale is thin. It burns if you look at it wrong.
But here is the other thing: nutritional yeast burns pretty easily too. If you cook it at a temperature higher than 300°F, the yeast can turn dark and taste really bitter.
I once tried to speed up the process by cranking the oven to 400°F. The chips looked brown and toasty, but they tasted awful.
Fix it: Keep the temp low. If your oven runs hot (you can buy a cheap thermometer to check), you might even want to try 275°F and just bake them a little longer.
Uneven Cooking
Does your oven have a “hot spot”? Mine does. The back right corner is like a volcano compared to the front.
If you notice some chips are black and others are green, it’s probably your oven, or the size of your chips.
If you have giant leaves next to tiny crumbs, the crumbs burn first.
Fix it: Try to tear the kale into pieces that are roughly the same size. And don’t forget to rotate that pan halfway through baking. It really helps.
The Resting Time
This is the hardest part. When you pull the tray out, the chips might feel a tiny bit soft still.
Don’t panic.
As they cool down on the metal sheet, they crisp up. It’s like cookies. They need a minute to set. Give them 3 to 5 minutes on the counter before you judge them.
 6")
There you have it! Making Crispy Kale Chips with Nutritional Yeast isn’t super hard, but it does take a little bit of patience. Once you get the hang of it, you’ll never look at a bag of potato chips the same way again.
It’s cheesy, it’s salty, and hey, it’s a vegetable! That counts as a salad in my book.
So, grab a bunch of kale on your next grocery run and give this a try. Even if you mess up the first batch, keep trying. It is worth it.
Don’t forget to take a picture of your crunchy creations (before you eat them all!) and share it on Pinterest so others can join the healthy snacking club!