Did you know that overcooking is the absolute number one reason people hate making fish at home? It’s a total tragedy because a perfectly baked filet is pure magic! I remember the first time I tried to impress a date with a “fancy” seafood dinner; let’s just say the fish came out dry enough to use as a doorstop, and we actually ended up ordering a pizza. But I refused to give up on it. After years of testing (and failing a bunch), I finally cracked the code to the most tender, flavorful Simple Baked Salmon with Garlic you will ever taste. In this guide, I’m going to show you exactly how to get that restaurant-quality flakiness right in your own kitchen, using ingredients you probably already have sitting in your fridge.

Selecting the Perfect Salmon Filet for Baking
You know, for the longest time, I was absolutely terrified of the seafood counter. I’d walk up, stare at the glass case for five minutes, and then panic-buy a bag of frozen chicken nuggets instead. It’s funny because I always thought you needed some special “chef intuition” to pick out a good piece of fish. But after a few disasters—like that one time I bought a piece of salmon that smelled so strong my cat wouldn’t even go near it—I realized it’s actually pretty simple. You just have to know what to look for.
When you are planning to make Simple Baked Salmon with Garlic, the fish you start with matters more than the fancy butter you put on top.
Fresh vs. Frozen: The Truth
Here is a little secret that might surprise you: “fresh” isn’t always better. Unless you see the ocean from your kitchen window, the “fresh” fish at the counter has likely been out of the water for a while. Honestly, I often grab the frozen fillets. They are usually flash-frozen right on the boat, which locks in the flavor. If you do buy fresh, just use your nose. It should smell like the ocean, salty and clean. If it smells “fishy” or like ammonia, turn around and walk away. Seriously, don’t buy it.
The Best Cut for Baking
I’ve learned this the hard way: not all slices are created equal.
- Center-Cut Fillets: These are the gold standard. They are thicker and uniform in size, which means they cook evenly.
- Tail Pieces: These are thinner. They cook super fast, which is fine, but if you bake them at the same time as a thick piece, the tail will turn into jerky before the thick part is done.
Keep the Skin On
I used to ask the guy at the counter to cut the skin off because it grossed me out. Big mistake! The skin acts like a little heat shield between the hot pan and the delicate meat. It keeps the salmon moist and stops it from falling apart when you try to lift it. You can always just eat around it later if you want.
So, next time you are at the store, don’t overthink it. Look for bright color, firm meat that springs back when you poke it (if they let you), and no bad smells. Getting the right piece is half the battle won.

Essential Ingredients for the Garlic Butter Sauce
Okay, now that we have our fish sorted out, let’s talk about the sauce. This is honestly my favorite part. I used to think restaurants had some secret ingredient that I couldn’t buy, but it turns out it’s just about using the right stuff in the right way.
When you are making Simple Baked Salmon with Garlic, you can’t hide behind a bunch of breading or deep frying. The sauce is everything. Here is what you need to grab from the kitchen.
The Garlic Situation
I have a confession. For years, I bought that huge jar of pre-minced garlic that sits in the fridge forever. It’s convenient, sure. But one day, my friend Sarah came over while I was cooking and she literally took the jar out of my hand. She said, “No way, we are chopping this fresh.” And wow, she was right.
Fresh garlic has a kick and a smell that the jarred stuff just doesn’t have. The stuff in the jar tastes kinda sweet and weirdly sour to me now. For this recipe, grab a couple of fresh cloves and mince them up yourself. It takes two minutes, and it makes the whole house smell amazing.
Butter vs. Olive Oil? Use Both!
This is a trick I learned a while back. If you use just butter, it can burn in the oven before the fish is done. If you use just olive oil, you miss out on that rich, creamy taste.
So, I use a mix. I melt about two tablespoons of salted butter and mix it with a tablespoon of good olive oil. The oil helps stabilize the butter so it doesn’t smoke up your oven, and you still get that decadent buttery flavor we all want.
Fresh Lemon is Non-Negotiable
Please, I am begging you, put down the little yellow plastic squeeze bottle. That stuff tastes like cleaner. Since salmon is a fatty fish (the good kind of fat!), you need something sharp to cut through it. Fresh lemon juice brightens everything up. I usually slice half the lemon to bake right on top of the fish for looks, and squeeze the other half into my butter mix.
Herbs and Spices
You don’t need to go crazy here. I stick to:
- Fresh Parsley: It adds a nice pop of color and a fresh taste.
- Salt and Pepper: I use kosher salt because the grains are bigger and it’s easier to control how much you’re adding.
- Dill (Optional): If you have it, great. If not, don’t worry about it.
That’s it. Simple ingredients you probably have right now. You mix them all up in a little bowl, and you have liquid gold ready to go.

Step-by-Step Guide to Baking Salmon
Alright, class is in session! Just kidding. But really, following these steps is going to save you a headache later. I used to think I could just throw the fish in the oven and hope for the best. Spoiler: that didn’t work.
Here is exactly what you need to do to get that Simple Baked Salmon with Garlic perfect every time.
Prep Work: The Most Important Part
First thing, you gotta dry that fish. I grab a paper towel and pat it down gently. If the fish is wet, the butter sauce just slides right off. It’s like trying to put lotion on wet skin—it just makes a mess. You want the surface dry so the flavor actually sticks to the meat.
Seasoning
Next, get that garlic butter mix we made earlier. Don’t be shy with it. I use a little pastry brush, but a spoon works fine too. Cover every inch of the pink meat. It should look glossy and beautiful. I usually try to scoop up the little chunks of garlic and make sure they sit right on top of the filets so they get nice and roasted.
Oven Temperature
I set my oven to 400°F (that’s about 200°C). I know some recipes say 350, but I think the higher heat cooks it faster. This is good because it seals in the juices before the fish has a chance to dry out. It usually only takes about 12 to 15 minutes, which is faster than ordering a pizza.
Foil vs. Parchment Paper
I am all about easy cleanup because I hate doing dishes. I always line my baking sheet. You can use foil, but sometimes the skin sticks to it, and it tears when you try to serve it. I prefer parchment paper. The fish never sticks to parchment, and when you are done, you just crumple it up and throw it in the trash. No scrubbing required!

How to Tell When Your Salmon is Done
This is the part that used to stress me out the most. I remember staring at the oven timer, praying I wouldn’t dry out dinner. It is actually pretty tricky because a minute too long can ruin the texture. But I learned that the timer is just a suggestion. Your eyes and a simple fork tell the real story.
Here is how you check your Simple Baked Salmon with Garlic without guessing.
The Fork Test
This is the easiest trick in the book. Take a fork and gently stick it into the thickest part of the fish. Give it a little twist. If the meat separates easily into layers—we call this “flaking”—it is ready to eat. If it feels rubbery or tough to push the fork through, it probably needs another minute or two.
Check the Temperature
If you want to be 100% sure, use a digital meat thermometer. It takes the guesswork out of it. The official food safety rules say to cook it to 145°F. However, keep in mind that the temperature will keep rising a bit after you take it out of the oven. I usually pull mine out right around 135°F to 140°F. By the time I serve it, it’s perfect.
Watch for the Color Change
Raw salmon is a deep, translucent pink. When it cooks, it turns into an opaque, light pink. You might also see some white stuff oozing out of the sides. That is called albumin. It is just a protein and is totally safe to eat. But, if you see a ton of that white stuff, it usually means the fish is getting overcooked.
Let It Rest!
I know you are hungry. The garlic butter smells amazing and you want to dig in. But please, wait about 3 to 5 minutes. Just let the pan sit on the counter. This lets the juices settle back into the meat. If you cut into it right away, all that delicious moisture runs out onto your plate, and the fish ends up dry.

Serving Suggestions and Side Dishes
Okay, so the main event is ready. The salmon looks amazing, and your kitchen smells like a fancy Italian restaurant. But what are you going to put next to it on the plate? You definitely need something to soak up that extra garlic butter sauce. It is too good to waste!
Here are a few things I rotate through depending on how lazy I am feeling that night.
Vegetables
Since the oven is already hot, I love doing roasted vegetables.
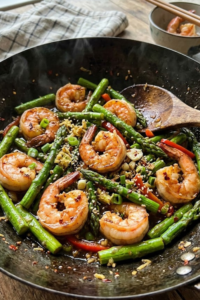
- Asparagus: This is my go-to. I just snap the woody ends off and throw the spears onto the same baking sheet as the fish for the last 10 minutes. They cook perfectly in that time.
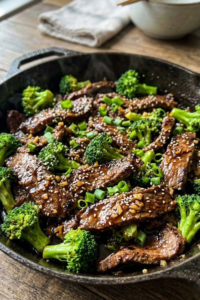
- Broccoli: Steamed broccoli works well too. The little florets act like sponges for the lemon butter.
- Green Beans: Fresh green beans with a little salt are crunchy and balance out the soft fish.
The Carbs
- Rice: I usually make a pot of plain white rice or quinoa. It’s simple, and when you spoon the sauce over it, it tastes incredible.
- Potatoes: If I have more time, roasted baby potatoes are delicious. Just make sure you start cooking them way before the fish because they take longer.
Wine Pairing
Now, I am no sommelier (I barely know how to pronounce it), but I do know that a cold glass of white wine makes this feel like a special meal. A Sauvignon Blanc or a Pinot Grigio is nice and crisp. It cuts through the butter really well.

So there you have it. We covered everything from picking the freshest catch at the store to the exact moment you should pull it out of the oven so it doesn’t dry out. See? Making healthy, delicious food really doesn’t have to be a big production.
I hope this helps you feel a little more confident in the kitchen. Next time you are rushing around on a Tuesday night trying to figure out dinner, remember this recipe is your best friend. It’s fast, it’s healthy, and it tastes like you spent hours on it.
If this guide saved your dinner (or just saved you from ordering pizza again), please pin it to your “Healthy Eats” board on Pinterest so you never lose it! Enjoy your meal!