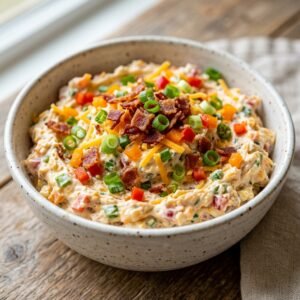
Tuna and bean lunch prep is a protein-rich, portable meal combining canned tuna with beans for a quick, nutritious dish. This recipe delivers balanced macros, simple ingredients, and weeknight-friendly preparation for busy professionals and health-focused eaters. The concept centers on convenience without sacrificing flavor or nutritional value, making it ideal for batch cooking and portable lunches. With a few pantry staples, you can assemble a satisfying bowl that stays fresh for days.
Recipe Overview
| Prep Time | 15 minutes |
|---|---|
| Cook Time | 10 minutes |
| Total Time | 25 minutes |
| Servings | 4 |
| Difficulty | Easy |
| Cuisine | Mediterranean |

Why This Recipe Works
This tuna and bean lunch prep succeeds because it leverages simple, high-quality ingredients for a harmonious flavor profile. The lemon juice brightens the tuna while the beans provide creamy texture and fiber, creating a satisfying mouthfeel. I rely on this combination for its versatility, allowing easy swaps based on seasonal produce or pantry availability. The dish is naturally gluten-free and dairy-free, catering to common dietary needs without extra steps. It also scales effortlessly for meal prep, saving time during busy weeks.
From a practical standpoint, the recipe requires minimal equipment and no advanced techniques, making it accessible to all skill levels. The use of canned tuna ensures consistent quality and reduces cooking time, while beans add plant-based protein for sustained energy. I appreciate how the flavors meld in the fridge, improving over time for better leftovers. This tuna and bean lunch prep aligns with healthy eating goals by emphasizing whole foods and balanced nutrition. Incorporating it into your routine supports fitness and convenience simultaneously.
Ingredients
| Ingredient | Quantity | Notes with alternatives |
|---|---|---|
| Canned tuna in water | 2 cans (5 oz each) | Choose solid or chunk light; substitute with cooked salmon for variety. |
| Cannellini beans | 2 cans (15 oz each), drained | Rinse well; substitute with chickpeas for a different texture. |
| Red onion | 1/2 cup, finely diced | Soak in water to reduce sharpness; substitute with shallots for milder flavor. |
| Cucumber | 1 cup, diced | Use English cucumber for fewer seeds; substitute with bell peppers for crunch. |
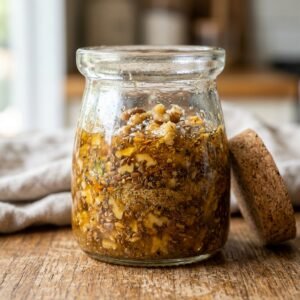
| Olive oil | 3 tablespoons | Extra virgin for best taste; substitute with avocado oil for a neutral option. |
| Lemon juice | 2 tablespoons, fresh | Brightens the dish; substitute with lime juice for a tangy twist. |
| Parsley | 1/4 cup, chopped | Fresh flat-leaf for aroma; substitute with cilantro for a herbal note. |
| Salt | 1/2 teaspoon | Adjust to taste; use sea salt or pink salt as preferred. |
| Black pepper | 1/4 teaspoon | Freshly ground for best flavor; substitute with white pepper for heat. |

Step-by-Step Instructions
Phase 1: Prepare the Base
Drain the canned tuna and beans thoroughly to remove excess liquid, preventing a watery salad. In a large mixing bowl, flake the tuna with a fork for even distribution. Add the cannellini beans to the bowl, combining them gently to avoid breaking the beans. This creates a cohesive foundation for your tuna and bean lunch prep.
Phase 2: Add Fresh Elements
Dice the red onion and cucumber into uniform pieces for consistent texture and visual appeal. Toss these vegetables into the bowl with the tuna and beans, stirring to incorporate evenly. The freshness enhances the nutritional profile and adds a crunchy contrast to the soft beans and tuna.
Phase 3: Dress and Season
Whisk together olive oil, lemon juice, salt, and pepper in a small bowl for the dressing. Pour the dressing over the mixture and fold gently until every ingredient is coated. Stir in the chopped parsley last, allowing it to wilt slightly and release its aromatic oils.
Phase 4: Rest and Serve
Let the salad rest for 10 minutes to allow flavors to meld, then portion into containers for storage. This step is crucial for the best taste in your tuna and bean lunch prep, especially when made ahead. Serve chilled or at room temperature, adjusting seasoning if needed before eating.

Chef Tips for Perfect Results
- Use high-quality tuna: Opt for wild-caught or pole-and-line options to maximize flavor and sustainability, which enhances the overall dish.
- Rinse beans thoroughly: This removes excess sodium and starch, ensuring a cleaner taste and better texture in your tuna and bean lunch prep.
- Adjust dressing acidity: Add lemon juice gradually; the goal is a bright balance without overpowering the delicate tuna flavor.
- Chop vegetables finely: Uniform pieces distribute flavors evenly and make the salad easier to eat with a fork.
- Let it marinate: Rest the salad for at least 30 minutes if possible; the beans absorb the dressing for deeper flavor.
Common Mistakes to Avoid
- Over-draining tuna: Why it matters: Removing all moisture makes the salad dry. How to fix: Leave a teaspoon of liquid for moisture without sogginess.
- Skipping parsley: Why it matters: Fresh herbs add necessary brightness. How to fix: Always include it or substitute with dill for a similar effect.
- Using stale beans: Why it matters: Old beans can taste bland. How to fix: Check expiration dates and choose low-sodium canned varieties for best results.
- Over-mixing: Why it matters: Breaking beans or tuna creates a mushy texture. How to fix: Fold gently with a spatula or spoon.
- Ignoring salt balance: Why it matters: Canned items vary in sodium. How to fix: Taste and adjust seasoning after combining all ingredients.
Variations and Substitutions
| Ingredient | Substitution | Impact on Flavor |
|---|---|---|
| Canned tuna | Cooked chicken breast | Milder taste, less briny but still high-protein. |
| Cannellini beans | Black beans | Earthy flavor with a firmer texture for variety. |
| Red onion | Green onions | Milder, sweeter profile that pairs well with beans. |
| Olive oil | Greek yogurt | Creamier dressing with tang, adds probiotics. |
| Parsley | Green chilies | Spicy kick for those who prefer heat. |
Serving Suggestions and Pairings
Pair this tuna and bean lunch prep with whole-grain crackers or a side salad for a complete meal. For a Mediterranean twist, serve with pita bread and hummus on busy weekdays. At picnics or potlucks, it pairs excellently with grilled vegetables or a fruit salad for freshness. During lunch hours, enjoy it chilled from a portable container, ideal for office or school settings. Consider accompanying it with iced herbal tea or lemon water for hydration.
For special occasions, elevate the dish with a sprinkle of capers or olives for briny depth. This tuna and bean lunch prep complements both light dinners and hearty brunches, adapting to various appetites. Use it as a topping for greens to create a nutritious salad bowl. Internal links: Explore more [healthy lunch ideas](https://example.com/healthy-lunch) and [meal prep recipes](https://example.com/meal-prep) for inspiration. For authority, reference the [American Heart Association](https://www.heart.org) on balanced diets.

Storage and Reheating
| Method | Duration | Instructions |
|---|---|---|
| Refrigerator | 3-4 days | Store in airtight containers; keep separate from moist sides to maintain texture. |
| Freezer | Up to 1 month | Portion into freezer bags; thaw overnight in fridge before serving. |
| Room temperature | 2 hours | Safe for short-term storage; avoid prolonged exposure to heat. |

Nutritional Information
| Nutrient | Amount per Serving |
|---|---|
| Calories | 320 (approximate) |
| Protein | 25g (approximate) |
| Fat | 12g (approximate) |
| Carbohydrates | 28g (approximate) |
| Fiber | 8g (approximate) |
| Sugar | 2g (approximate) |
| Sodium | 450mg (approximate) |
Frequently Asked Questions
What is the best tuna for tuna and bean lunch prep?
The best tuna is canned in water or olive oil with minimal additives for clean flavor. Solid or chunk light tuna works well for texture. Choose sustainable brands to align with environmental standards.
Can I use dried beans instead of canned?
Yes, cook dried beans ahead of time for fresher taste, but it adds about an hour of cooking. Rinse canned beans for convenience and lower sodium. Dried beans offer cost savings and control over seasonings.
How do I know if the salad is fully combined?
The salad is ready when the dressing coats every ingredient evenly without pooling at the bottom. Fold gently until no dry spots remain. Taste a small portion to confirm flavor balance.
Is this recipe suitable for make-ahead meal prep?
Absolutely, tuna and bean lunch prep stores well for up to four days in the fridge. The flavors improve after resting overnight. Portion into containers for easy grab-and-go lunches.
What if the salad tastes bland?
Add more lemon juice or a pinch of salt to brighten the flavors immediately. Fresh herbs like parsley can also revive a dull batch. Avoid adding excess oil, which can mask subtleties.
Can I serve this tuna and bean lunch prep warm?
Yes, gently heat in a pan over low flame, but avoid boiling to prevent tuna from drying out. Serve at room temperature for best texture. Warming enhances the bean creaminess slightly.
How do I troubleshoot a watery salad?
Drain tuna and beans thoroughly before mixing; pat vegetables dry with a towel. If it becomes watery later, drain excess liquid before serving. Adjust dressing quantities to avoid over-dressing.
What are good low-sodium options?
Use low-sodium canned beans and tuna, then season with herbs instead of salt. Lemon juice and vinegar add flavor without sodium. This variation keeps the dish heart-healthy.
Can I double the recipe for more servings?
Yes, scale ingredients proportionally, but use a larger bowl for even mixing. It stores the same way, though freshness peaks at day three. Consider freezing portions for longer storage.
How does this fit into a balanced diet?
Tuna and bean lunch prep provides protein, fiber, and healthy fats for sustained energy. Pair with whole grains or veggies for complete nutrition. Refer to USDA guidelines for daily intake.
Conclusion
Tuna and bean lunch prep offers a reliable, nutritious solution for weekly meals, combining simplicity with satisfying flavor. By following the steps and tips, you can create a dish that energizes and delights. Its versatility ensures it remains a staple in any kitchen, ready to adapt to your preferences. Embrace this recipe for a healthier, more convenient lunch routine. The signature briny tuna and creamy beans will become your go-to flavor.
Print
Tuna and Bean Lunch Prep
A protein-rich, portable meal combining flaked tuna with creamy cannellini beans and fresh veggies. This Mediterranean-inspired recipe is quick to make, balanced in nutrients, and perfect for weeknight meals or meal prepping.
- Total Time: 25
- Yield: 4 servings 1x
Ingredients
2 cans (5 oz each) canned tuna in water
2 cans (15 oz each) cannellini beans, drained and rinsed
1/2 cup finely diced red onion
1 cup diced cucumber
2 tablespoons olive oil
1 tablespoon lemon juice
1/4 cup chopped fresh parsley
1/4 teaspoon salt
1/4 teaspoon black pepper
Instructions
Drain and rinse cannellini beans thoroughly
Flake tuna with a fork in a large mixing bowl
Add diced red onion and cucumber to the tuna
In a small bowl, whisk olive oil, lemon juice, parsley, salt, and pepper to make the dressing
Pour dressing over the tuna and bean mixture, stir gently
Portion into meal prep containers or store in an airtight container in the fridge
Notes
Substitute cannellini beans with chickpeas for a different texture
Replace red onion with shallots for a milder flavor
Store in the refrigerator for up to 4 days
Improves in flavor overnight as ingredients marinate
- Prep Time: 15
- Cook Time: 10
- Category: High Protein Meals
- Method: Mixing/Marinating
- Cuisine: Mediterranean
- Diet: High Protein
Nutrition
- Serving Size: 1 container (250g)
- Calories: 220
- Sugar: 3g
- Sodium: 400mg
- Fat: 10g
- Saturated Fat: 1.5g
- Carbohydrates: 15g
- Fiber: 6g
- Protein: 28g
- Cholesterol: 35mg